Rocket Stove
11/29/06 01:50 PM Filed in: House Construction
The past month was spent mainly on the construction of the Rocket Stove and the heated bench.
This first picture shows the brickwork that makes up the rocket stove. The wood gets fed into the shorter stack, on the right, which will be capped off with the silver barrel to the right. The flames angle towards the tall stack, called the heat riser, in the horizontal burn tunnel. The heat riser will be insulated with the piece of sheeting that Andrew and I are shaping (metallic printer's plate) filled with clay/sawdust. A large metal barrel is placed over that, with about 1-1/2 inch of gap around the perimeter for the hot air to travel down towards the flue.
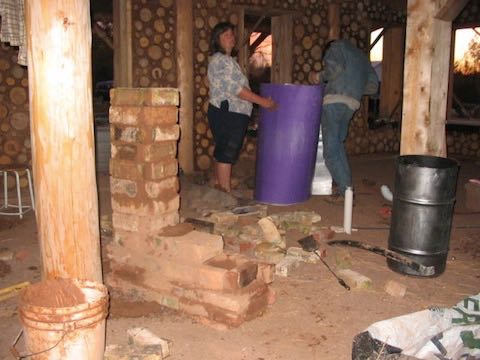
Here is the insulation container in place and filled.
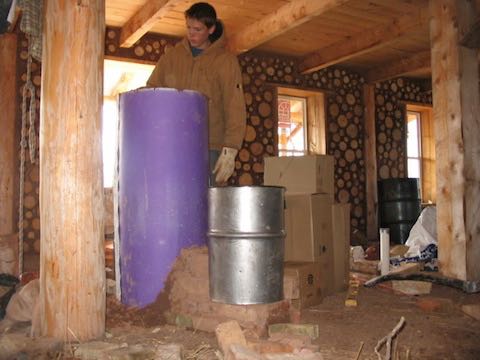
This picture is taken from the same angle as the above to show the finished rocket stove.
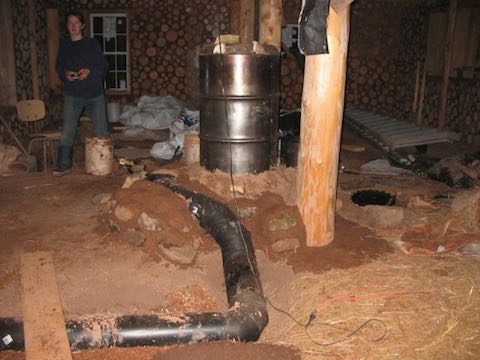
Here is the bench in progress, showing the layer of stones and the ductwork going through the bench and down into the floor. There is a clean out trap built in on the top left, which can be accessed from underneath the bench.
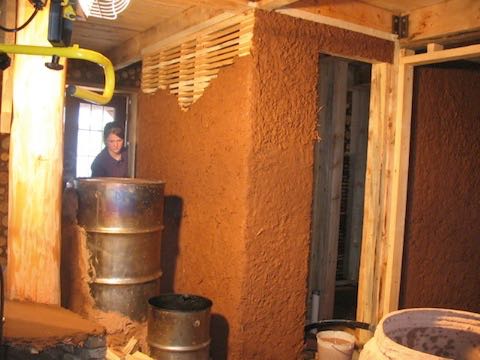
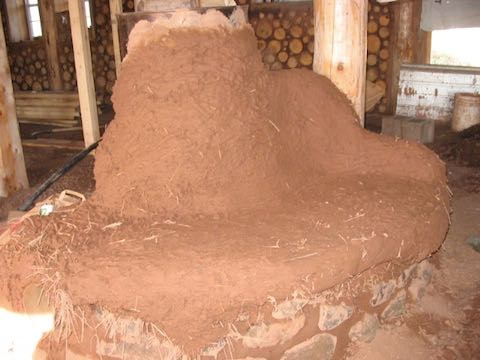
This picture shows the straw rich cob towards the outer layer.
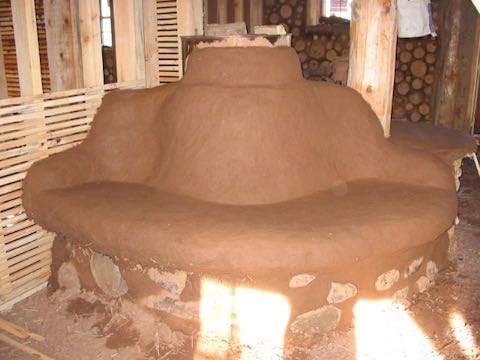
Here is the bench with the finish plaster coat on.
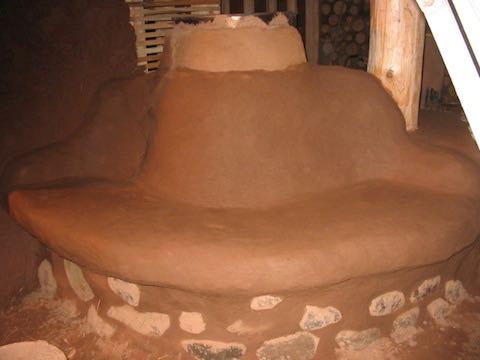
Here is the bench as it is today. The rocks will be cleaned and polished and the bench will get several coatings of hemp oil to shine, harden and waterproof it, plus some homemade cozy cushions.
This first picture shows the brickwork that makes up the rocket stove. The wood gets fed into the shorter stack, on the right, which will be capped off with the silver barrel to the right. The flames angle towards the tall stack, called the heat riser, in the horizontal burn tunnel. The heat riser will be insulated with the piece of sheeting that Andrew and I are shaping (metallic printer's plate) filled with clay/sawdust. A large metal barrel is placed over that, with about 1-1/2 inch of gap around the perimeter for the hot air to travel down towards the flue.

Here is the insulation container in place and filled.

This picture is taken from the same angle as the above to show the finished rocket stove.

Here is the bench in progress, showing the layer of stones and the ductwork going through the bench and down into the floor. There is a clean out trap built in on the top left, which can be accessed from underneath the bench.

This picture shows the straw rich cob towards the outer layer.

Here is the bench with the finish plaster coat on.

Here is the bench as it is today. The rocks will be cleaned and polished and the bench will get several coatings of hemp oil to shine, harden and waterproof it, plus some homemade cozy cushions.

blog comments powered by Disqus